Introduction: Understanding the Need for Decal Removal
Decals have long been a popular way to express individuality, promote businesses, or simply add a touch of personal flair to vehicles. However, there may come a time when these decals no longer serve your intended purpose, leading you to seek methods to remove them. Knowing how to remove decal from car window is not only essential for aesthetic reasons but also for maintaining the integrity of your vehicle’s glass.
Improper removal techniques can lead to scratches or leftover adhesive residue, which can diminish the appearance of your car. In this article, we will provide step-by-step instructions and practical tips to ensure a clean finish when removing decals from car windows. Whether you’re tackling a stubborn sticker or a large vinyl graphic, our guide will equip you with the knowledge needed for successful removal.

The Importance of Proper Decal Removal
How to remove decal from car window? Understanding the importance of proper decal removal techniques is key to achieving the best results without damaging your car.
1. Preserving the Integrity of Your Vehicle
- Avoiding Scratches and Damage: Car windows are made of a delicate glass material that can easily be scratched. Using the wrong tools or techniques can lead to unsightly marks or scratches that decrease your car’s resale value and appearance.
- Preventing Adhesive Residue: Many individuals overlook the issue of adhesive residue left behind after a decal is removed. This sticky remnant can make your car window appear messy and detracts from the overall aesthetic.
2. Preparing for Successful Removal
Essential Tools
- Gather Your Materials
Before you begin the decal removal process, it’s crucial to equip yourself with all the necessary tools and materials. Having everything prepared in advance will ensure a smooth and efficient removal experience. This preparation can save time and prevent frustrations that may arise from searching for tools during the process. - Plastic Scraper or Credit Card
A plastic scraper or an old credit card is an essential tool for decal removal. These items are perfect for gently lifting the edge of the decal without scratching the glass surface. The plastic material ensures that you won’t damage the glass while effectively prying the decal away. - Hairdryer or Heat Gun
Heat is an important factor when it comes to loosening the adhesive that holds the decal in place. A hairdryer or a heat gun can be used to warm the decal and the adhesive underneath. This increased temperature helps break down the adhesive bond, making it easier to remove the decal with minimal effort. When using heat, it’s important to keep the appliance at a safe distance to avoid damaging the glass. - Adhesive Remover
Having a good adhesive remover or a solvent specifically designed for removing sticky residues is vital. These products help dissolve any leftover glue that may remain on the glass after the decal is removed. Look for adhesive removers that are safe to use on automotive glass and won’t harm the surrounding surfaces. - Clean Microfiber Cloths
Microfiber cloths are ideal for cleaning the glass before and after decal removal. They are soft and non-abrasive, ensuring that you won’t leave scratches or streaks on the surface. Additionally, these cloths can be used to wipe away any remaining adhesive remover or dirt after the decal has been taken off, resulting in a clean finish.
Choosing the Right Location
- Select a Suitable Area
Choosing the right location to perform decal removal is crucial for achieving the best results. A proper workspace can significantly impact the ease of the process, allowing you to focus on removing the decal effectively without distractions. - Working in a Shaded Location
Ideally, you should work in a shaded area where there is little to no direct sunlight. When the glass heats up too much from sun exposure, it can make the adhesive more challenging to manage. A cooler surface helps ensure that the adhesive remains pliable rather than hardening, allowing for easier decal removal. - Consider the Weather Conditions
Alongside choosing a shaded area, consider the overall weather conditions, such as temperature and humidity. Mild temperatures are typically the best for decal removal, as excessive heat can change the consistency of the adhesive, making it more difficult to remove. - Avoid Windy Areas
Ensure that the area is not too windy; gusts of wind can blow dirt and debris onto the working area. Such contaminants can get trapped under the adhesive remover and lead to scratches or marks on the glass during the removal process. - Organize Your Space
Once you’ve chosen a suitable location, take a moment to organize your tools and materials. Having the necessary items easily accessible enhances efficiency and minimizes the potential for mistakes. Creating a clean and organized workspace can make the entire decal removal process smoother and more effective.
Step-by-Step Process for Removing Decals
Now that you understand the significance of proper techniques, let’s delve into the step-by-step process for effectively removing decals from your car windows.
1. Heating the Decal
- Using Heat to Loosen Adhesive: Start by using a hairdryer on medium heat. Hold it approximately 6–12 inches away from the decal and move it back and forth over the decal for 30 seconds to 1 minute. The heat helps soften the adhesive, making the decal easier to peel off.
- Navigating Hot Spots: Focus on one section of the decal at a time. This targeted approach allows you to control the heat application and keeps the rest of the surface cool.
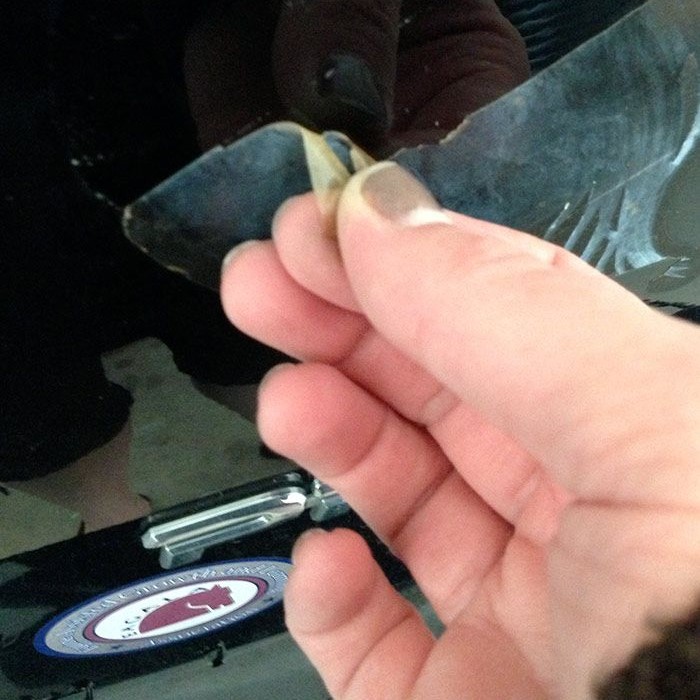
2. Peeling Off the Decal
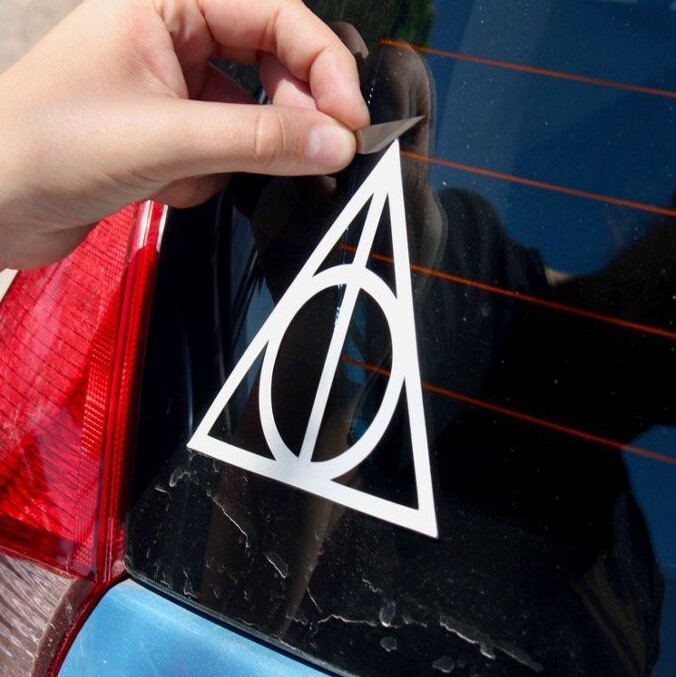
- Utilizing a Plastic Scraper: After heating, gently use a plastic scraper or a credit card to lift a corner of the decal. Plastic scrapers are ideal because they won’t scratch the glass.
- Slow and Steady: Pull the decal back at a gradual angle rather than yanking it off. This technique minimizes the risk of tearing and ensures that you remove the entire decal in one go.
3. Dealing with Residual Adhesive
Assessing Residue
- Initial Inspection: After successfully removing the decal, thoroughly examine the glass surface for any remaining adhesive. It is important to closely inspect the edges and corners, as these areas often retain glue more than the center.
- Common Adhesive Issues: It is not unusual to find leftover glue after decal removal. The adhesive may adhere strongly to the glass, making it appear messy and detracting from the overall appearance of your vehicle.
- Identifying the Type of Residue: Different decals may leave varying types of residue. Some might leave a thick, gummy layer, while others may create a slimy or sticky surface. Recognizing the nature of the residue can guide your choice of removal products.
Applying Adhesive Remover
- Choosing the Right Product: Select an appropriate adhesive remover for the task. Both commercial adhesive removers and rubbing alcohol are effective options. If using a commercial product, read the label to ensure suitability for use on glass.
- Preparation for Application: Before applying the remover, prepare your workspace. Grab a clean microfiber cloth or sponge—this will help absorb the adhesive remover without scratching the glass surface.
- Application Technique: Dampen the cloth with the chosen adhesive remover, and avoid soaking it too much. Gently press the damp cloth onto the adhesive residue, ensuring it makes contact without excessive rubbing initially.
- Circular Motion for Effectiveness: Begin to rub the residue in a gentle, circular motion. This technique helps loosen the adhesive while minimizing the risk of scratching the glass. Avoid aggressive movements, as they can damage the surface.
Allowing Time for Penetration
- Soaking for Stubborn Residue: If the adhesive residue is particularly stubborn, allow the adhesive remover to soak into the glue for a short period—generally about one minute. This soaking time is important as it enables the remover’s chemicals to penetrate and dissolve the adhesive more effectively.
- Benefits of Penetration: Allowing the remover to sit on the adhesive assists in breaking down the chemical bonds between the glue and the glass. This process can save you time and effort during the actual removal, as the residue will be easier to wipe away after soaking.
- Watching the Process: During the soaking period, observe any changes in the adhesive. You may notice the glue beginning to soften or bubble, which indicates that the remover is working effectively.
4. Cleaning the Window
- Final Cleaning Steps: After you have removed all remnants of the decal and excess adhesive, it is time to clean the window. A glass cleaner or a solution of vinegar and water works great to eliminate streaks and enhance clarity.
- Using a Microfiber Cloth: Employ a fresh microfiber cloth to buff the window after applying the cleaning solution. Ensure you wipe in a circular motion, which helps achieve a streak-free finish.
Additional Tips for Seamless Decal Removal
To make your decal removal process even smoother, consider these helpful tips.
1. Exercise Patience
- Take Your Time: Rushing through decal removal can lead to mistakes and damage. Patience is essential to ensure that you achieve a clean result without harming your vehicle.
2. Be Mindful of Weather Conditions
- Ideal Temperatures for Removal: The best temperatures for decal removal are moderate. Very high or low temperatures can affect the adhesive’s effectiveness and your overall ability to cleanly remove the decal.
Alternative Methods for Decal Removal
If you’re encountering particularly stubborn decals, here are some alternative methods to consider.
1. Vinegar and Water Solution
- Natural Alternative: Mix equal parts vinegar and water in a spray bottle. Spray the solution on the decal and let it sit for a few minutes before scraping it off. Vinegar’s acidity helps break down the adhesive.
2. Using WD-40
- Effective Lubricant: As a multi-purpose product, WD-40 can also help in removing decals. Spray a small amount directly onto the decal and allow it to soak before attempting to peel it off.
FAQs: Common Questions About Decal Removal
- How do you get decals off of car windows?
To remove decals, heat the decal with a hairdryer, gently lift it using a plastic scraper, then treat any adhesive residue with rubbing alcohol or an adhesive remover. - How to remove a decal from your car without damaging it?
Use a plastic scraper to avoid scratching, apply heat to loosen the adhesive, and take your time to ensure careful handling throughout the process. - Does rubbing alcohol remove car decals?
Yes, rubbing alcohol is effective for dissolving adhesive residue left over after removing a decal. It helps clean the glass without damaging it.
Conclusion: Achieving a Clean Finish After Decal Removal
In conclusion, learning how to remove decal from car window effectively can significantly enhance your vehicle‘s appearance. Following the right techniques is crucial for preventing damage and ensuring a clean, polished result.
By preparing adequately, employing the steps outlined, and utilizing the right tools and techniques, you can confidently tackle any decal removal challenge. Whether you’re preparing your car for a fresh new look or simply cleaning up, a clean window free of decals not only improves the visual appeal but also showcases your vehicle at its best.
As you embark on your decal removal journey, remember that patience and attention to detail are vital. With the steps mentioned above, you’ll be well-equipped to achieve a pristine finish that enhances your vehicle’s aesthetics. Enjoy your newly refreshed windows!