Introduction to Reupholstering Car Seats
Reupholstering car seats can breathe new life into your vehicle. It’s a way to personalize the interior, repair damage, or update an outdated design. Whether your car seats are worn out, or you simply crave a new look, learning how to reupholster a car seat can be a rewarding DIY project. This guide will provide you with a step-by-step approach to help you navigate the process with ease.
Before diving in, it’s important to understand the complexity of the task. Reupholstering requires patience, precision, and a bit of creativity. While it may seem daunting at first, with the right tools and guidance, you can transform your car seats from drab to fab. It’s not just about aesthetics; a proper reupholstering job can enhance your comfort and increase the resale value of your car.
Keep in mind that different car models may have specific requirements when it comes to seat design. However, the general principles of how to reupholster a car seat remain the same. In the following sections, we’ll go through the essential steps of the process, from removing the old upholstery to the final touches that ensure a professional-looking finish. Let’s get started on revamping your car’s interior!
Tools and Materials Required
Before you begin with how to reupholster a car seat, gather all necessary tools and materials. This preparation makes the process smoother and helps avoid interruptions. Here’s what you’ll need:
- Screwdriver set: To remove seat fasteners and hardware.
- Upholstery fabric: Choose a durable and comfortable material that matches your style.
- Scissors: For cutting fabric and foam.
- Staple gun and staples: To secure the new upholstery.
- Pliers: For removing old staples and fasteners.
- Foam and batting: To replace worn out padding.
- Adhesive spray: To attach foam and batting to the seat.
- Upholstery thread and needle: For sewing any parts that need it.
- Seam ripper: To safely remove old fabric without damaging the seat.
- Marker or chalk: To mark cut lines on the new fabric.
Remember to choose quality materials that will endure the wear and tear of daily use. Invest in a staple gun that can handle the thick layers of fabric and foam. Have all tools at hand to ensure the reupholstering goes without a hitch.
Removing the Old Upholstery
The first active step in learning how to reupholster a car seat is removing the old upholstery. Start by taking the car seat out of the vehicle. This will give you better access and control. Use your screwdriver set to unfasten any screws or bolts. Put them aside safely; you will need them later.
Next, take your pliers to remove staples or fasteners holding the fabric in place. Remove them carefully to avoid damaging the seat’s frame. A seam ripper can help you detach fabric pieces that are sewn together. Work slowly and pay attention to how the original upholstery is attached.
As you detach the old fabric, inspect the foam and batting underneath. Look for signs of wear or damage. You will replace these materials if they are not in good condition.
Keep the removed upholstery. Use it as a template for cutting your new fabric. This ensures the new pieces fit perfectly.
Clear away all removed materials and clean the seat frame. Now, you’re ready for the next step: preparing the seat for new upholstery.
Preparing the Seat for New Upholstery
Once you have removed the old upholstery, it’s time to get the seat ready for its fresh fabric. Take these key steps to prepare the seat properly:
- Clean the Seat Frame: Use a cloth to wipe down the seat frame. Make sure no debris or dust remains. This will ensure a clean surface for the new materials.
- Repair Any Damage: Check the frame for any broken parts or sharp edges. Repair them as needed. A solid frame is crucial for a successful reupholstery job.
- Apply New Foam and Batting: If the foam is worn out, replace it. Cut new foam to fit using the old pieces as templates. Use adhesive spray to attach it to the frame. Then, add the batting for extra comfort.
- Test Fit New Upholstery: Lay the new fabric over the seat to check the fit. Make adjustments as necessary. It’s important that the upholstery fits snugly.
- Marking for Precision: Use a marker or chalk to outline where you’ll cut the fabric. Follow the shape of the old upholstery for accuracy.
Proper preparation sets the stage for an excellent reupholstering project. Ensure everything is in place and you’re happy with how the materials fit. You are now ready to cut and fit the new upholstery. Stay patient and precise for the best results.
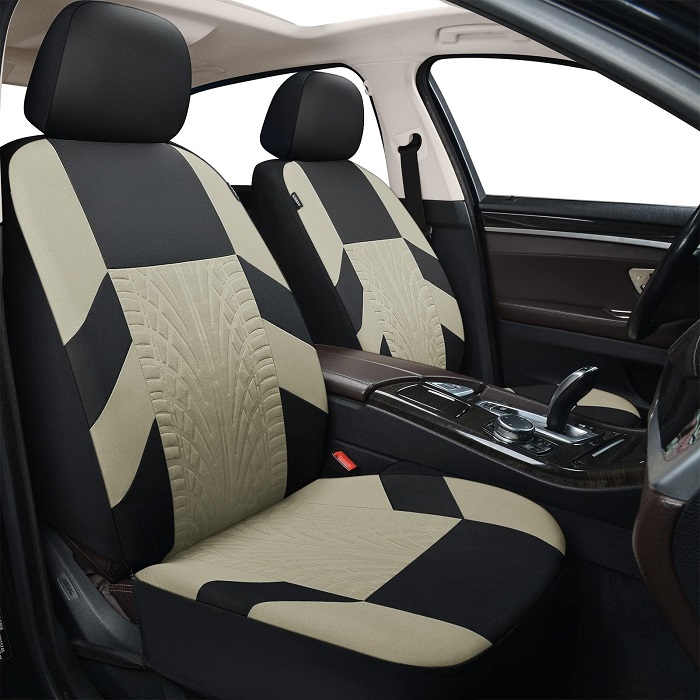
Choosing the Right Fabric and Materials

Choosing the right fabric and materials is critical for a successful reupholstering job. Here are key factors to consider:
- Durability: Select a fabric that can withstand regular use. Automotive-grade materials are best.
- Comfort: Consider the feel of the fabric. You want a material that is comfortable to sit on.
- Color and Pattern: Pick a color or pattern that complements your car’s interior. Remember, it’s about your style too.
- Resistance to Stains and Fading: The fabric should resist stains and not fade quickly. This keeps your seats looking good longer.
- Ease of Maintenance: Choose a material that is easy to clean. Some fabrics are specially treated for easier maintenance.
When selecting foam, go for high-density options that will hold their shape. For batting, a thick and soft type adds comfort.
It’s vital to invest in quality material when you start how to reupholster a car seat. This ensures your reupholstered seats last and gives the interior a polished look. Take your time when choosing and seek advice if needed.
Cutting and Fitting the New Upholstery
Now it’s time to cut and fit your new upholstery fabric. Precision and careful measuring lead to the best fit and look. Here’s how to do it correctly:
- Lay Out the New Fabric: Place the fabric on a flat surface. Spread it out with no wrinkles or folds.
- Use the Old Upholstery as a Template: Place the old upholstery pieces on top of the new fabric. This helps to ensure an exact fit.
- Trace and Cut: With marker or chalk, trace around the old upholstery on the new fabric. Keep lines clear and straight. Then, using scissors, cut the fabric following the marks you’ve made.
- Test the Fit on the Seat: Before you attach anything, place the cut fabric over the seat frame. Check that it fits snugly and covers the areas properly.
- Make Adjustments: If the fabric does not fit right, trim edges carefully or cut new pieces. It’s important that each piece matches the shape of the seat sections perfectly.
- Sew Parts if Needed: Some car seat designs require sewn parts. If yours does, sew them with upholstery thread and needle now.
Taking your time during the cutting and fitting stage is key. A perfect fit at this stage means less trouble later on. Once your fabric is cut and in place, you’re ready to secure it to the seat frame.
Securing the Upholstery to the Seat

After precisely cutting and test-fitting your new fabric, it’s time to secure it to the seat. This step is crucial for a smooth, professional finish. Here is how you can attach the upholstery firmly:
- Begin with the Staple Gun: Start at the center of each section. Pull the fabric tight over the foam and batting. Use the staple gun to attach the fabric to the seat frame. Make sure staples are close together for a firm hold.
- Work Towards the Edges: Gradually move towards the outer edges. Pull the fabric as you go to avoid wrinkles or sagging areas.
- Trim Excess Fabric: Once the upholstery is secure, trim away any extra fabric. Be careful not to cut too close to the staples.
- Fasten the Seat Hardware: If your seat design has any additional fasteners or hardware, reattach them now.
- Ensure a Tight Fit: Double-check all areas. Make sure the fabric is snug and secure across the entire seat. There should be no loose sections.
- Check for Comfort: Sit on the seat to test its comfort. This ensures your work not only looks good but feels good too.
By following these steps, you’ll secure the upholstery effectively. Your car seat should look as if it’s been done by a pro. Keep your movements steady and be consistent with your stapling pattern for the best outcome.
Finishing Touches and Maintenance Tips
After securing the upholstery to the car seat, the final touches are just as important to ensure a lasting finish and easy upkeep. Follow these tips to complete your project and maintain the new look:
- Smooth Out the Fabric: Run your hands over the upholstery to smooth out any small wrinkles or bubbles. The fabric should be tight against the foam.
- Inspect the Stitching: If you have sewn any sections, check the seams. Make sure they’re even and strong. This adds to the seat’s durability.
- Attach Additional Trim or Accessories: If your design includes piping, buttons, or other accessories, attach them now. They give a custom and polished look.
- Vacuum the Seat: Use a handheld vacuum to remove any debris or thread clippings. This keeps the work area neat and the finished seat clean.
- Apply a Protective Spray: To make cleaning easier, use a fabric protector spray. It helps guard against stains and spills.
Maintenance Tips:
- Clean Spills Immediately: Act fast to prevent stains. Use a gentle cleaner and a soft cloth.
- Regular Vacuuming: Keep the seats free of dust and dirt with weekly vacuuming.
- Avoid Direct Sunlight: When possible, park in the shade. Sunlight can fade the fabric over time.
- Use Seat Covers: Consider using removable covers for extra protection. They’re easy to wash and can extend the life of your upholstery.
By taking the time to add these finishing details and maintaining your newly upholstered seats, you ensure that your car’s interior remains looking great and feeling comfortable. Remember, the better you care for it, the longer it will last.